

Catalyst Multi-Language Setup
This tutorial shows you how to translate your Catalyst storefront into another language, in this case French, using the features available out of the box. It covers the three places where you update translations for a locale:
Prerequisites
Create a Catalyst storefront with One-Click Catalyst and choose the option to use sample catalog data. Then follow the Run locally steps to run it on your machine.
Add a locale in Catalyst
You can add languages when you create your Catalyst storefront. To add more later, enable them in the control panel:
- Under Channels, choose your Catalyst storefront and click the Localization tab.
- Click Add new Language, select the languages to add, and save. Make sure each new language is active.
Catalyst reads the enabled locales, and the subfolder each one is served at, from your default channel at runtime, so you don’t need to change any code or redeploy. The locale configuration is cached for about five minutes, so a newly added or changed locale can take up to five minutes to appear, both locally and on your deployed site.
Each enabled locale needs a matching translation file in messages/ (for example, messages/fr.json). Pages for an enabled locale without a file return a 404. See Static Translations.
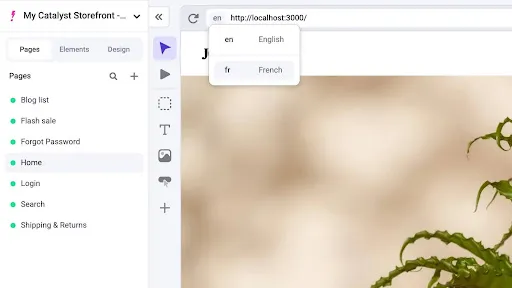
Start your development server. When you visit the running application (localhost:3000 by default), a language selector in the top right corner lets you toggle between locales:
The selector lists all the enabled locales in your storefront. The storefront in this tutorial uses English as the default language and French (fr) as an additional language.
Locale-specific URLs
Switch to your new locale, in this case fr, in the language selector. The locale prefix is added to the URL path, for example http://localhost:3000/fr. Catalyst uses prefix-based routing from the next-intl library, so each localized page is served under its locale’s prefix.
The prefix is the subfolder configured for the locale in the control panel, or the locale code if no subfolder is set. For example, a de locale configured with the subfolder de-de is served at /de-de. The locale served at the root (/) has no prefix.
Translate static strings
Catalyst’s fixed text is translated with static strings in the messages folder of your Catalyst app, which components read with the next-intl library. Catalyst ships static string translations for the locales it supports out of the box, such as fr.
-
In the
messagesfolder, open the French translation file,fr.json. It contains predefined translation keys, such as the ones for the empty cart message, along with their translations. -
Open the Cart page component,
app/[locale]/(default)/cart/page.tsx, to see how a server component reads translations by callinggetTranslations.next-intlimports translations based on the current locale that it detects. -
Open the cart and switch your locale to
FRto see the translated empty cart message.
After you enable a supported locale, some components are already translated. For an unsupported locale, define your own static string translations in this directory. To use translations in components you create, see Use keys in React components.
Translate dynamic data from BigCommerce
Catalyst fetches dynamic data from BigCommerce, and the data-fetching client sends the current locale with every GraphQL request. You don’t need any extra code to get locale-specific content.
Translate product data
Component text comes from translation files, but product data, such as the product name, variants, and description, comes from BigCommerce.
You translate product data by sending mutations with the GraphQL Admin API. Start by translating the name and description of your sample products with a mutation to set basic product information. To run the sample requests in Postman:
-
Download the Product Translations file.
This JSON file contains French translations for the sample products that come with your Catalyst storefront. Change the product IDs in the file to the actual product IDs from your store. The English translations are included for reference, but aren’t used in the requests.
-
Download the Sample Postman environment and import it into Postman. It includes the following environment variables, which you’ll need to populate:
store_hash- the store hash from your.env.localfilechannel_id- the channel ID from your.env.localfileaccess_token- a Store Level V2/V3 API token with theProductsOAuth scope that you can get by creating an API Account
Make sure to make this environment active in Postman.
-
Download and import the Postman collection for translations.
The collection includes requests for products, categories, and brands. This step uses the product requests.
-
Run the requests in the Postman Collection Runner. Select only the Product Basic Information mutation in the run sequence and upload the Product Translations file from Step 1.
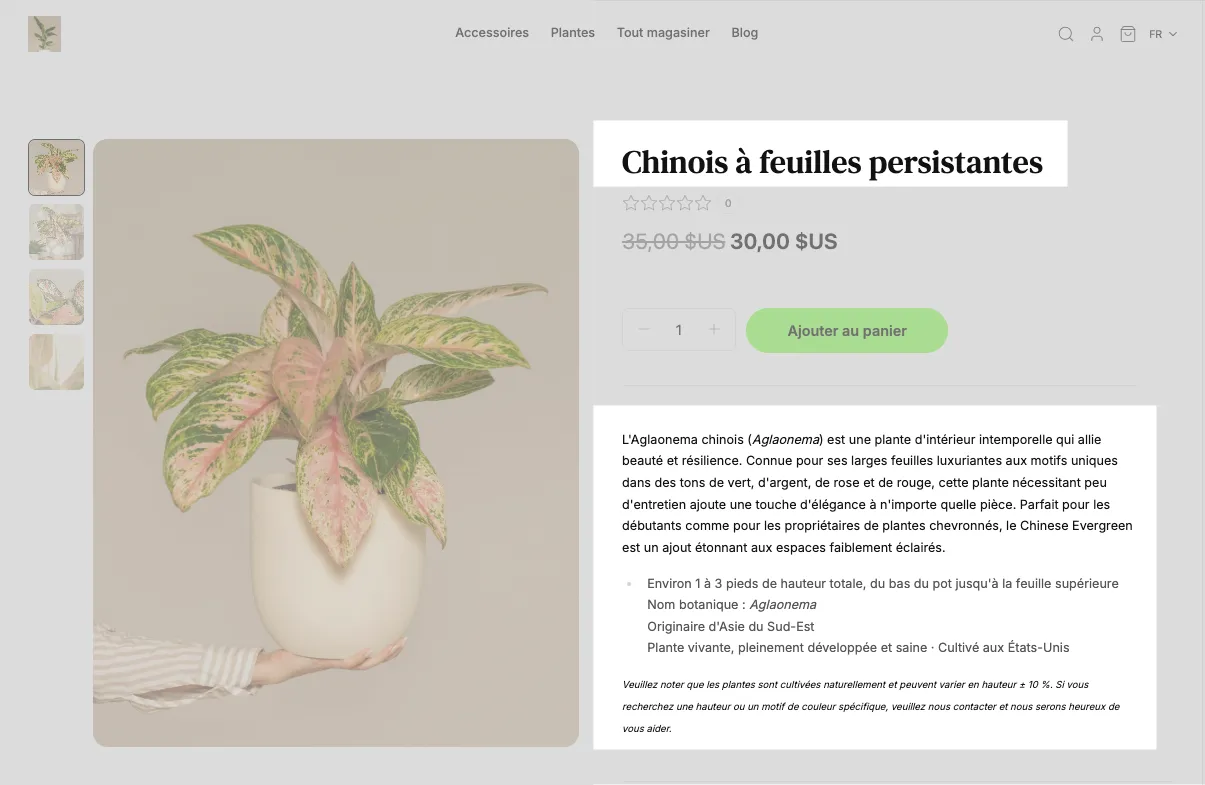
Your products should now have French translations for their names and descriptions. When you visit the product page at the path /fr/chinese-evergreen, you should see the translated product name and description:
Textual search
BigCommerce indexes the localized name, description, and search keywords for a product. This means you can match search queries to translated product content through these fields after you add translations. You’ve already translated the names and descriptions, so next add search keywords.
Search keywords are custom terms you can define so that a product is more visible in your storefront’s textual search. They aren’t visible on the storefront and don’t affect SEO, but help match more search queries to relevant products.
Your sample data doesn’t include predefined search keywords for your products. You can add them by sending a GraphQL mutation to set the storefront details for a locale.
In the Postman collection you imported earlier, open the Collection Runner again. This time, select the Product Search Keywords mutation in the run sequence. You can use the same Product Translations file you downloaded earlier since it also includes translations for search keywords.
With the sample data, when you search for the “communes” keyword, the Chinese Evergreen sample product should appear:
The textual search is powered by BigCommerce’s GraphQL Storefront API. Learn more about the capabilities and limitations of textual search, including fallback content for products that haven’t been translated.
Translate categories
Similar to products, category data is fetched dynamically from BigCommerce, including its name, description, page title, meta description, and search keywords. You can translate category data by sending GraphQL mutations with the GraphQL Admin API.
To run the sample requests in Postman:
-
Download the Category Translations file.
This file contains French translations for the sample categories that come with your Catalyst storefront. Change the category IDs in the file to the actual category IDs from your store. The English translations are included for reference, but aren’t used in the requests.
-
Open the same Postman collection for translations that you imported when you were translating product data. You can use the same sample Postman environment you imported earlier.
-
Run the requests in the Collection Runner. Select only the Categories mutation in the run sequence and upload the Categories Translations file from Step 1.
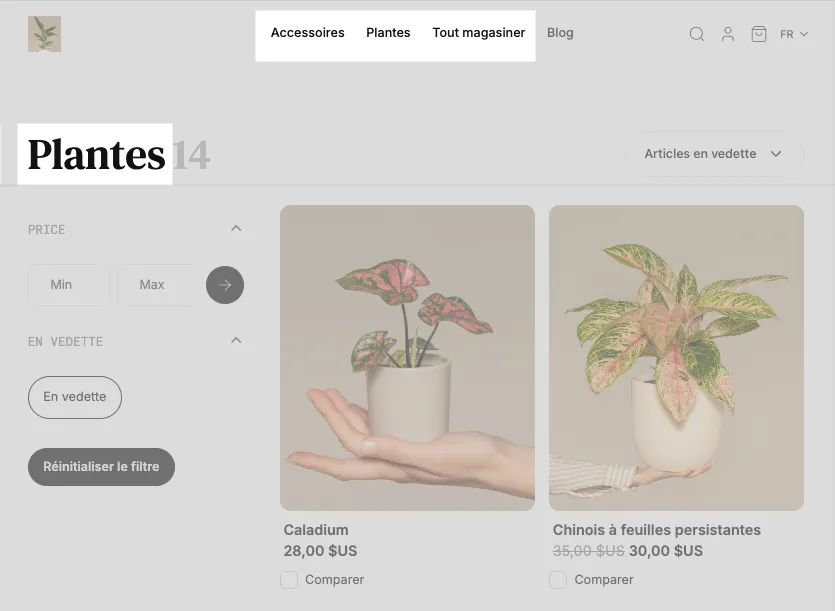
Refresh the page to see the translated category headings in the header. Translated category metadata appears in the page source.
Translate brands
A brand is an attribute that groups your products by label and supports SEO. Brand data is fetched dynamically from BigCommerce, including its name, page title, meta keywords, meta description, and search keywords. Before translating brands, add a brand to a product so that the brand is available on your storefront:
- Under the Products tab, click on Products.
- Click on the ellipses (…) next to the product you want to add a brand. Click Edit.
- In the Basic Information section, select the Rustic Roots brand in the dropdown. This brand came with the sample catalog data.
You translate brands with the same GraphQL Admin API mutations as categories. To run the sample requests in Postman:
-
Download the Brand Translations file.
This file contains French translations for the sample brands that come with your Catalyst storefront. Change the brand IDs in the file to the actual brand IDs from your store. The English translations are included for reference, but aren’t used in the requests.
-
Open the same Postman collection for translations that you imported when you were translating product data. You can use the same sample Postman environment you imported earlier.
-
Run the requests in the Collection Runner. Select only the Brands mutation in the run sequence and upload the Brand Translations file from Step 1.
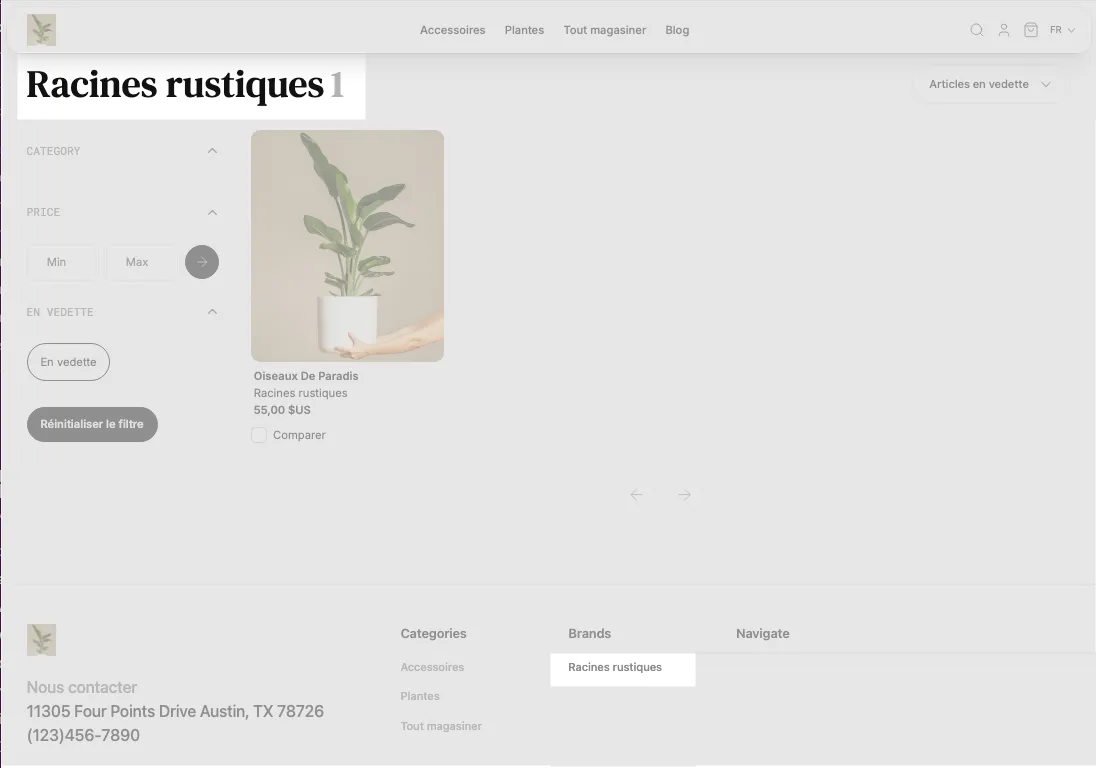
When you visit the brand page at the path /fr/rustic-roots, you should see the translated brand name, along with any translated brand metadata if you view the page source:
Translate Makeswift content
The Catalyst storefront you created with One-Click Catalyst is connected to a Makeswift site. In the Makeswift editor, you can add localized text for any component that you’re editing in Makeswift.
To try this out, make sure your development server is still running and visit the Makeswift editor by clicking the Edit in Makeswift button in the control panel. In the Makeswift editor, switch to your Development (Dev) Makeswift site.
To add a locale in Makeswift, open your site settings and go to the Locales tab. Then, click the + Add locale button. This tutorial adds fr.
Locales you add when creating your storefront with One-Click Catalyst are added to Makeswift automatically. Locales you add or change later must be added or updated in Makeswift manually.
You should now be able to switch to the French locale in Makeswift.
With the French locale selected, a message says that the localized page inherits from the default locale. To stop inheriting from the default and start customizing the content for the localized page, click the Edit for this locale button.
You can now customize the content for the French locale. This doesn’t affect the content in the default locale. In the canvas, click on the Slideshow component and change its text in the properties sidebar. You can also localize other properties like the slideshow image and its alt text.
For non-default locales, make sure you toggle the page to be online in the sidebar before publishing.
Next steps
- Translate more of your storefront’s fixed text with Static Translations.
- Sell in multiple regions by following the Catalyst Multi-Storefront Setup tutorial.
- Build your own language selector with the GraphQL Storefront API. See Create a custom language selector.