

Checkout SDK Tutorial
This tutorial assumes you are familiar with the Checkout SDK. If you are unfamiliar with the Checkout SDK, refer to Getting Started with Checkout SDK to get some general information.
In this tutorial, we will create a custom checkout using a checkout loader file, building on the steps from the Getting Started with Checkout SDK article. This tutorial will outline how to package a custom checkout file and install a custom checkout using the control panel.
Creating a checkout-loader.js file
In your text editor, create a file for upload called checkout-loader-<version>.js with the following content, where <version> represents an arbitrary version number used for invalidating cached versions of the file.
Comparing the content of this newly created file and the code from the Getting Started with Checkout SDK, you should see a clear resemblance between the two.
Use WebDAV to upload the checkout-loader.js file
You can upload the checkout-loader.js file to your store’s server using WebDAV by following the instructions below:
- Before proceeding, ensure you have downloaded Cyberduck, our recommended WebDAV client. For more information on how to use Cyberduck, refer to File Access (WebDAV).
- From your store control panel, navigate to Settings > Advanced > File access (WebDAV).
- To automatically connect with Cyberduck, see Single-click Login.
- To manually connect with Cyberduck, see Connecting with Cyberduck Manually.
- From Cyberduck, enter the
/contentfolder, create a new folder, and name it checkout. - Copy the file
checkout-loader.jsinto the newly created checkout folder on WebDAV.
Install your custom checkout using the control panel
To install a custom checkout on a store, follow these steps:
- Navigate to Settings > Advanced > Checkout in your store’s control panel.
- Under Checkout Type, select Custom Checkouts.
- Type the following in the Script URL field:
NOTES:
-
Prepending
webdav: indicates that the URL is in the remote WebDAV directory. It treats/contentas the root WebDAV directory. -
It is best practice to include a
<version>number in the Script URL field. Note that if you change the same provided loader filename, you could serve a cached version to the user.
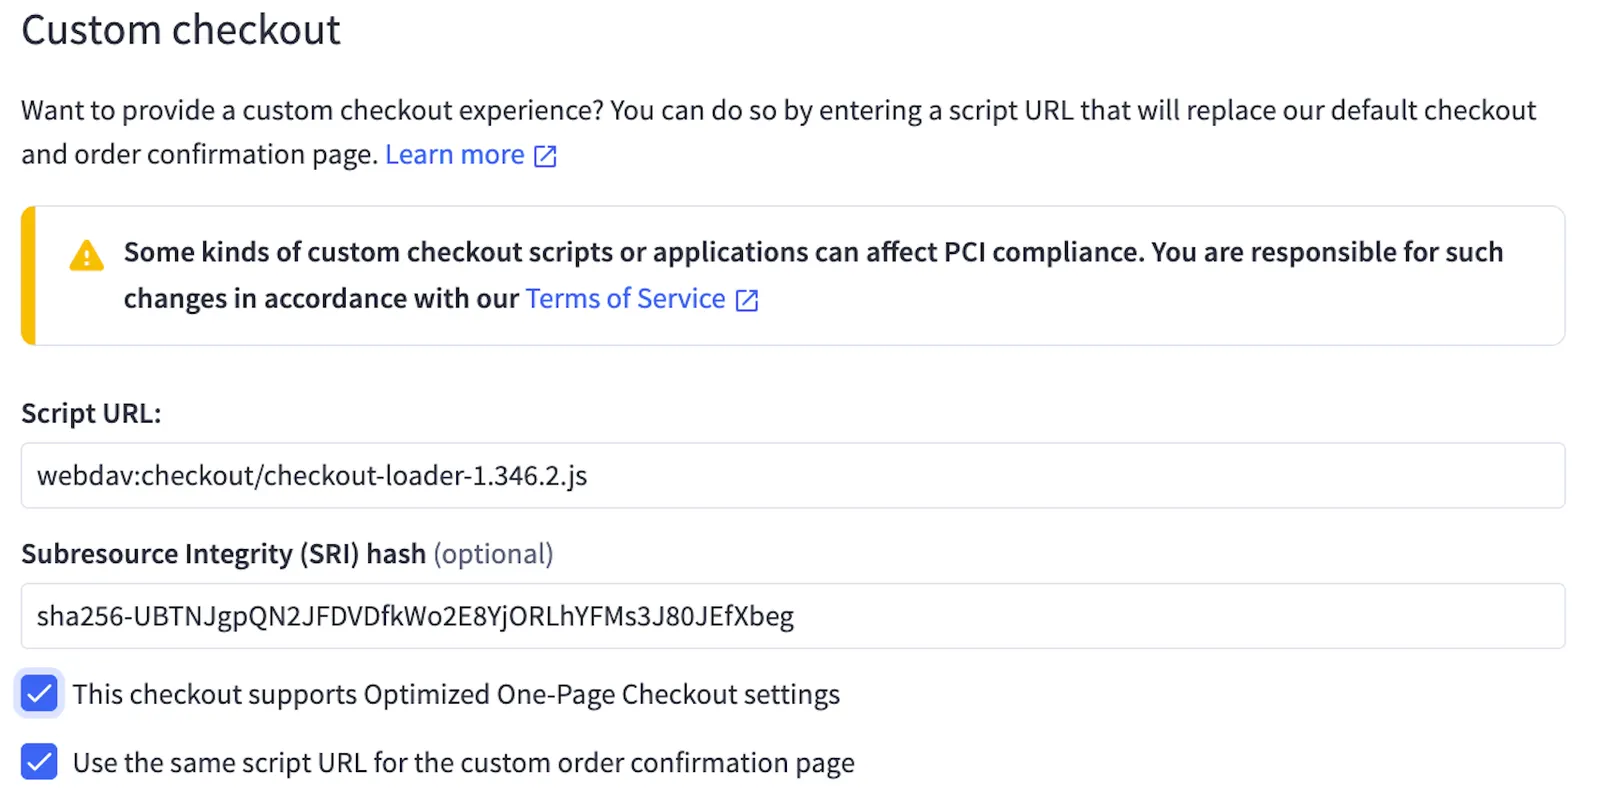
- Click the Save button at the bottom of the page.
- Navigate to your live storefront to view your new custom checkout.
Log the checkout object
- Open your browser console and ensure you are logged in to collect cart and checkout information.
- Add an item to your cart and proceed to the checkout page. The checkout page will be blank below the header.
- From your developer’s console, execute the following command to fetch checkout content:
In the developer console, you will see the checkout object, and you can test out additional state.data commands.
This tutorial also gives you the steps to build a custom checkout. Instead of working with code in our theme, as shown in the Getting Started with Checkout SDK article, we created a file and uploaded it to WebDAV, effectively taking over the entire checkout experience.
Resources
Sample apps