

Managing Apps in the Developer Portal
Create, edit, and submit apps for approval using the Developer Portal. In Beginning App Development, we briefly touched on how to create a draft app. In this article, we’ll go over how to perform other common app management tasks. To get started, sign in or create an account in the Developer Portal.
Store email address constraint
Apps that aren’t approved for distribution through the App Marketplace can only be installed on stores owned by the same email address as the developer portal account’s email address.
Create an app profile
Creating an app also creates an app API account. To learn more about app API accounts, see the Guide to API Accounts. To create an app, do the following:
Information optional
No app profile fields are mandatory unless you’re preparing the app for BigCommerce App Marketplace approval. To learn more about preparing an app for approval, see our App Publishing Guide.
-
Sign in or create an account with the Developer Portal.
-
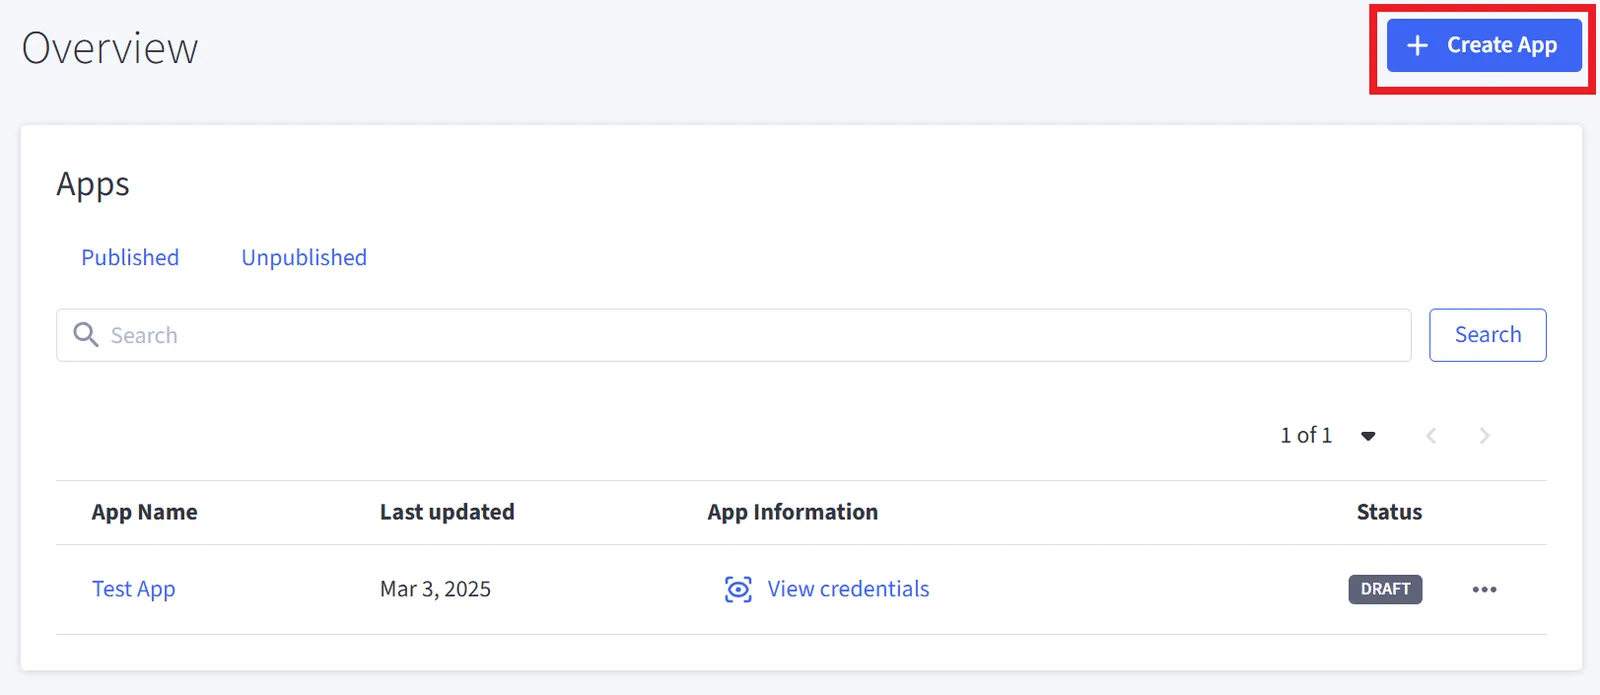
Click the Create app button on the right side of the landing page.
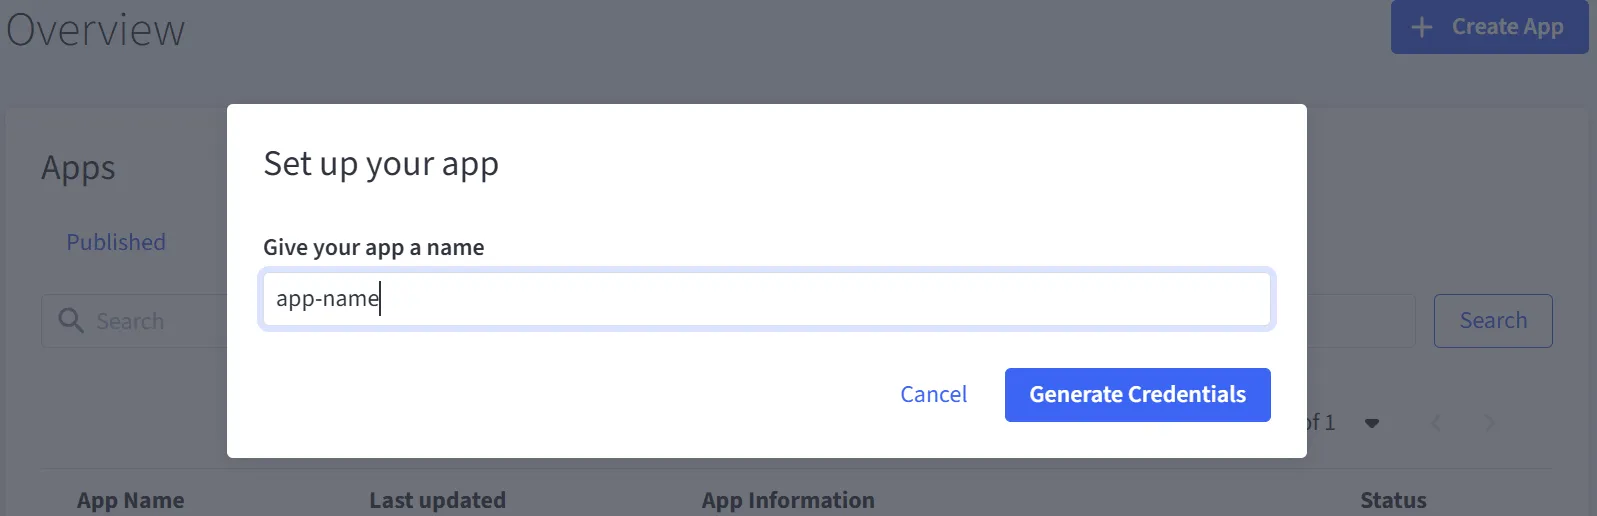
- Give your app a name in the Set up your app dialog. This name is only visible to you. Once complete, click the Generate Credentials button.
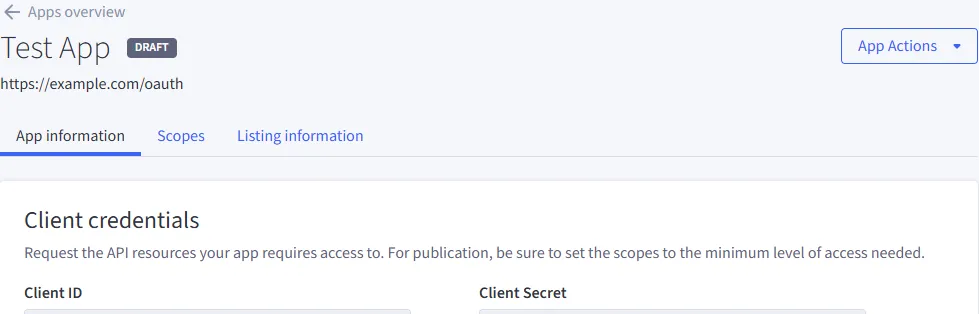
- The app created dialog appears, displaying your app’s Client ID and Client Secret. Click the Finish button to redirect the page to the app editor.
- Click the Scopes tab at the top.
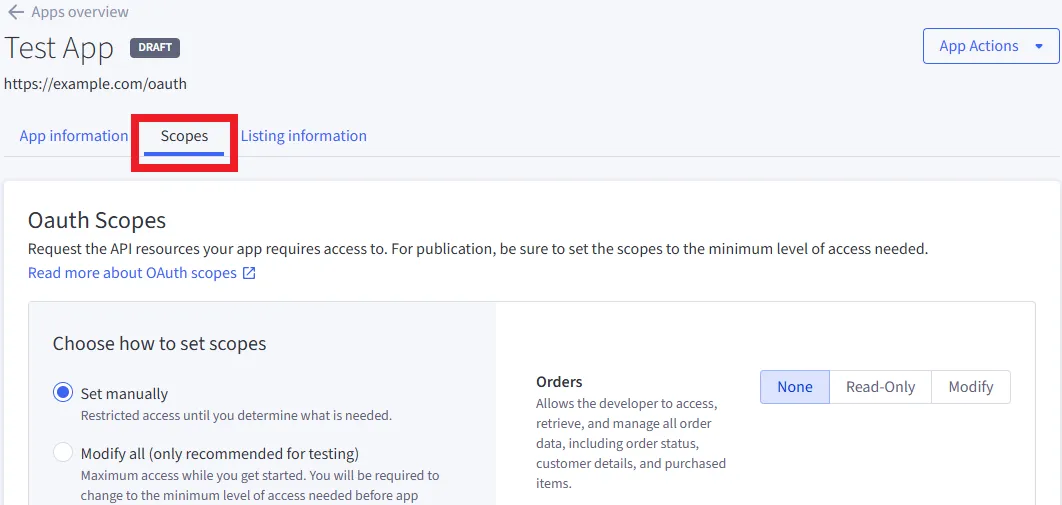
- Toggle the necessary OAuth scopes for your app.
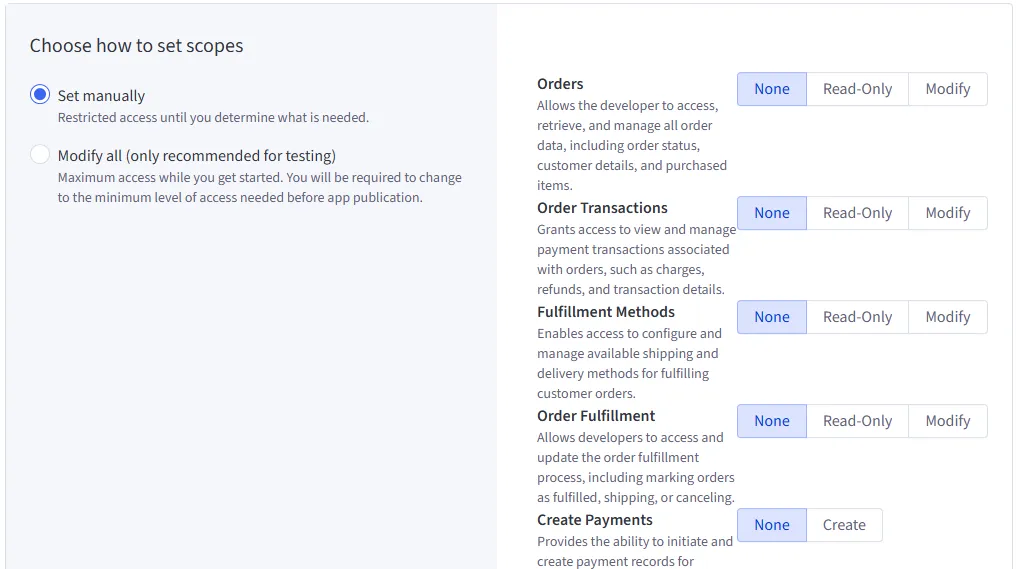
-
Click the Save changes button on the registration dialog’s lower right corner.
-
A new dialog opens, asking if you want to add new OAuth scopes. Click Confirm new scopes.
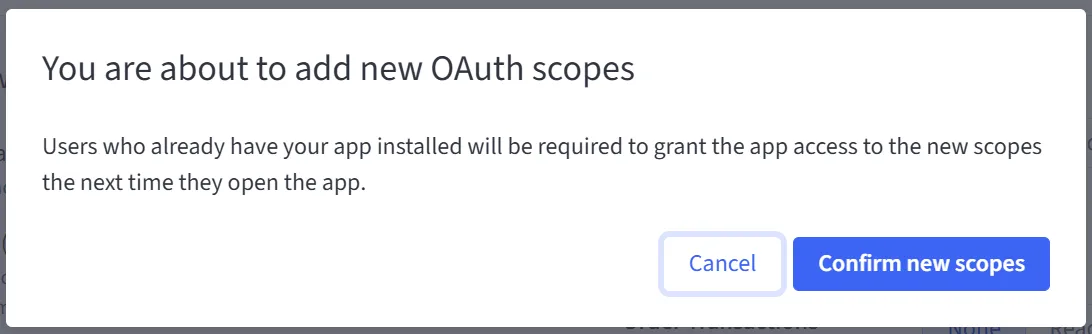
You can view the client ID and client secret any time; see the following section on viewing credentials.
View credentials
- To view an app API account’s credentials, navigate to the Dev Portal’s Apps overview and click the View credentials icon to the right of the relevant app’s listing.

- A dialog box opens to reveal your API account credentials.
To learn more about using an app API account to generate store-specific access tokens, see Implementing the OAuth Flow.
Edit an app profile
- To edit an app, navigate to the Dev Portal’s Apps overview and click the name of the app you want to edit.

- The app editor opens.
Marketplace delay
Edits can take up to 24 hours to appear in the App Marketplace, but changes are immediately effective and visible in your existing users’ store control panels.
Edit technical details
- Once you enter the app editor, click the App information tab at the top to edit enabled features and callback URLs.
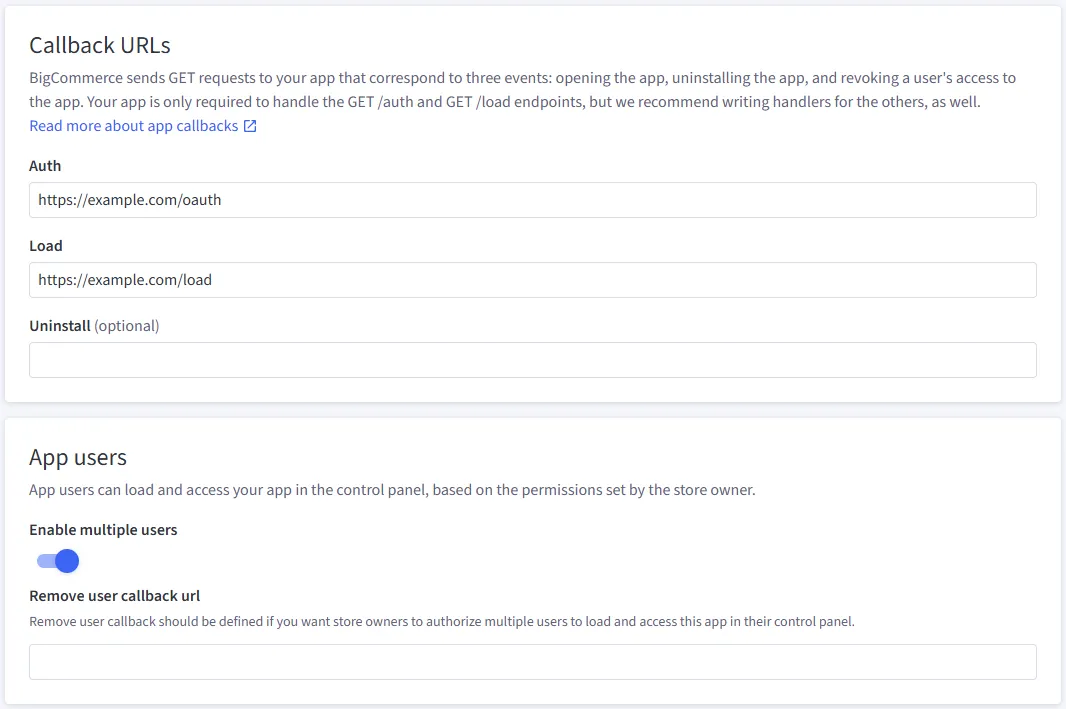
- To edit OAuth scopes, click the Scopes tab at the top.
-
To save your change, click the Save changes button on the editor’s lower right corner.
-
A new dialog opens, asking if you want to add new OAuth scopes. Click Confirm new Scopes.
- After saving, edits are effective immediately for all app users.
Indicate multi-storefront support
If your app supports stores that sell through multiple storefronts or sales channels, add that information to the app’s profile.
- Once you enter the app editor, click the Listing information tab at the top.
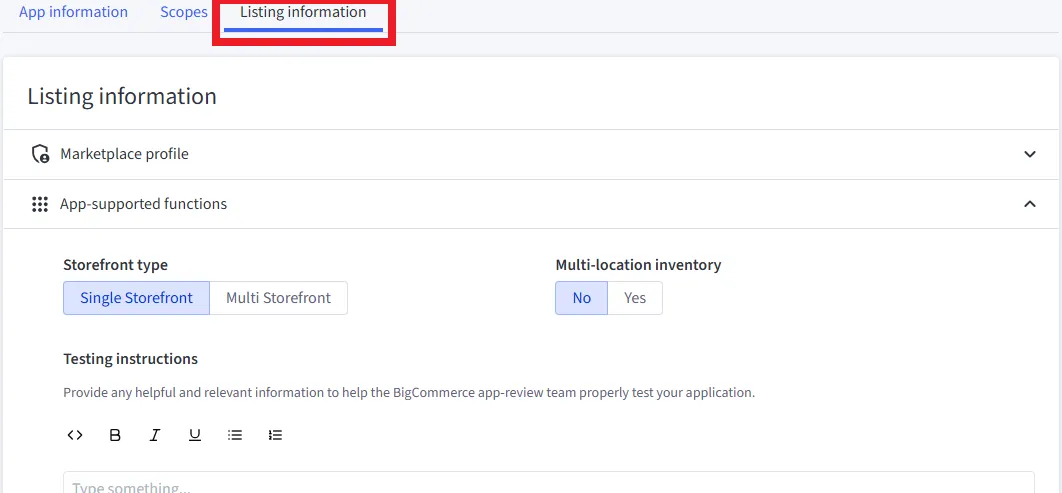
- Select either Single Storefront or Multi Storefront. This doesn’t grant or deny your app access to any APIs; it helps us test and label your app appropriately.
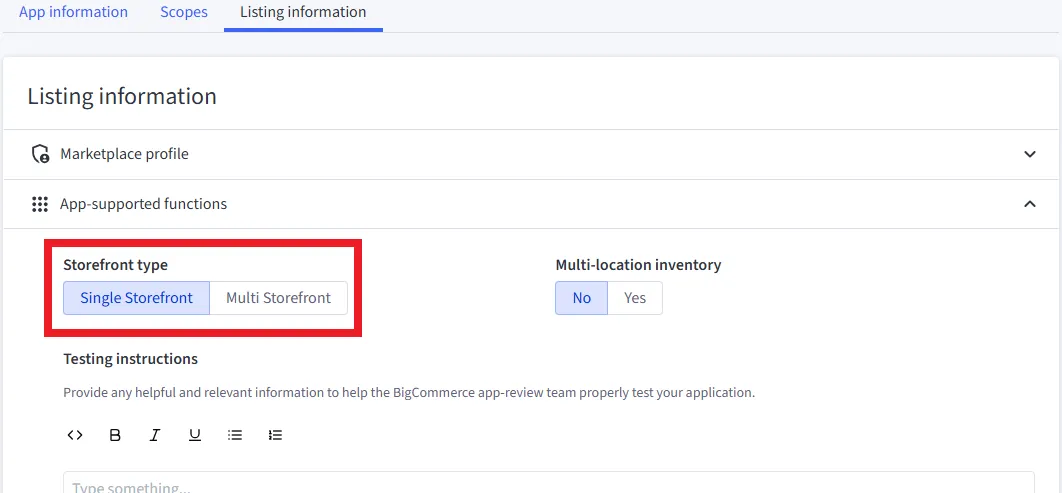
- To save your change, click the Save changes button on the edit dialog’s lower right corner.
To read about designing or modifying your app to support multi-storefront, see Multi-Storefront App Compatibility and Optimization
Submit an app for approval
- Submit apps for App Marketplace approval by navigating to the Dev Portal’s Apps overview, then finding the app you want approved and clicking the Publish app… option from the action menu to the right of its listing.
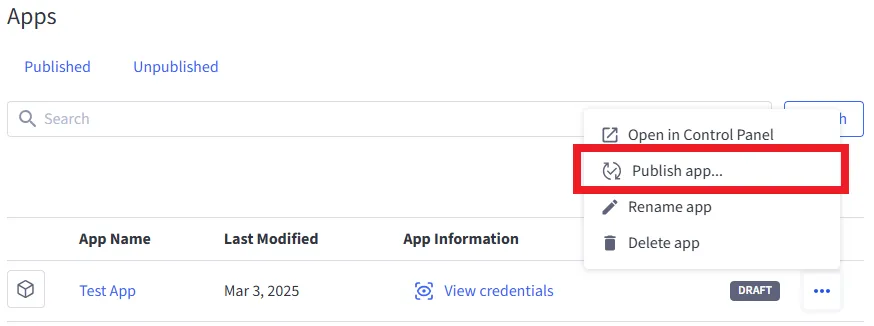
- The Confirm listing information page opens; verify the information provided, and click the Submit app for review button in the bottom right corner.
To learn more about completing app registration fields and submitting apps for approval, consult our App Publishing Guide.
Deleting apps
Deleting an app also deletes its API account. This is a destructive action; you can’t recover the app or its API account. Do not delete an app without serious consideration, particularly if it is in production. It is likely to have far-reaching negative impacts on your users’ stores.
To learn about mitigating the risks of deleting an app and its API account, see the Guide to API Accounts.
- To delete an app, navigate to the Dev Portal’s Apps overview and click the Delete app option from the action menu to the right of its listing.
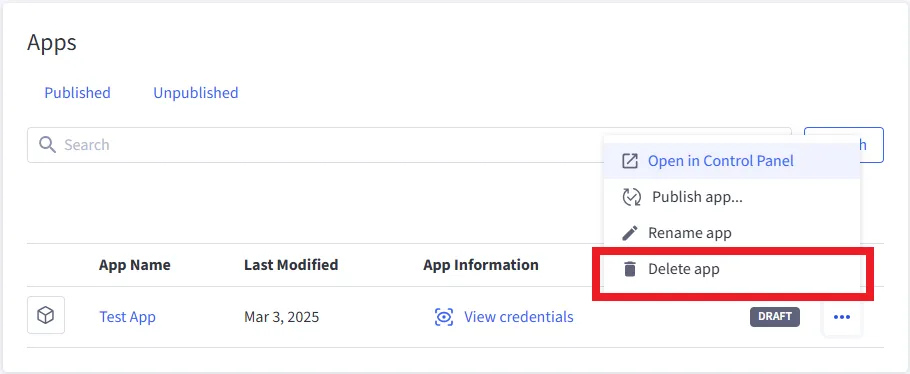
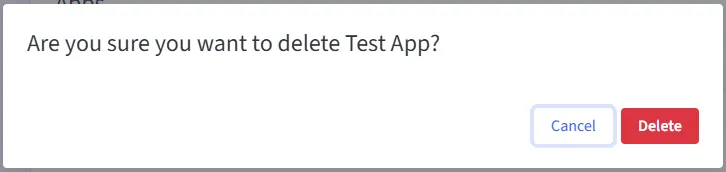
- The delete app dialog opens to verify whether you truly want to delete the app. Click Delete.
Next steps
Resources
Related articles
- Introduction to Building Apps
- Beginning App Development
- Implementing App OAuth
- App Approval Requirements
- Publishing an App
- Guide to API Accounts
Other resources
- Developer Portal (build.bigcommerce.com)
- Partner Portal (partners.bigcommerce.com)
- Technology Partner Program (partners.bigcommerce.com)
- BigCommerce App Marketplace (bigcommerce.com)