

3: Single-click authentication
In this exercise, you move into “MULTITENANT” mode, which enables the full single-click app flow. In this production-intended mode, every request is scoped to a store through the /store/[storeHash] route segment, and each store’s access token is obtained during install and looked up per request from durable storage instead of one hard-coded value.
Because the aim of this exercise is to support the full single-click app flow, there a few added layers you’ll be dealing with:
- A remote tunnel must be used to expose your local app over a public HTTPS URL.
- Your app must be registered in the BigCommerce Developer Portal.
- A storage layer must be implemented to save store API tokens and user information. You’ll be using a simple SQLite data file.
See the project repository documentation for more details on the setup process.
Expose localhost over HTTPS
Make sure you’re still running your local development server with pnpm dev.
BigCommerce needs a public, fully-qualified HTTPS URL for both the server-to-server callbacks and the control panel iframe. The following are three good options:
- VS Code port forwarding — Built into VS Code and free with a GitHub account.
- GitHub Codespaces — For this option, push your code into your own GitHub repository and use the “Create codespace” feature within the Code dropdown to start a remote environment. You’ll need to follow the project’s initial setup (installing dependencies, setting up
.env.local, and runningpnpm run dev) in the remote environment. Forwarding a port in a codespace works the same as in VS Code. - ngrok — A dedicated tunneling tool. A free account is required for a usable session length.
The project repository documentation includes steps for each of these options.
If VS Code or Cursor is your IDE of choice, the port forwarding option has the benefit of using a consistent remote URL each time you start the tunnel. The prerequisites for utilizing this option include:
- VS Code or Cursor as your IDE
- A GitHub account
In VS Code or Cursor, navigate to the Ports view and “Forward a Port”.
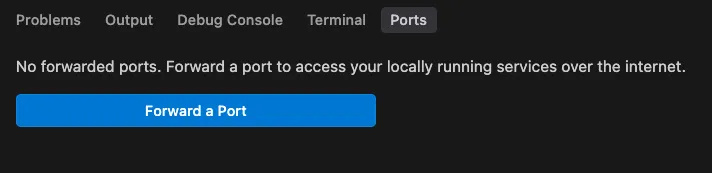
If you haven’t connected VS Code with GitHub before, you’ll be prompted to sign in. Enter the port to forward (3000, or the port in your dev server output).
As a critical final step, you must set the forwarded port’s visibility to Public! Right-click on the forwarded port and select “Port Visibility” -> “Public”.
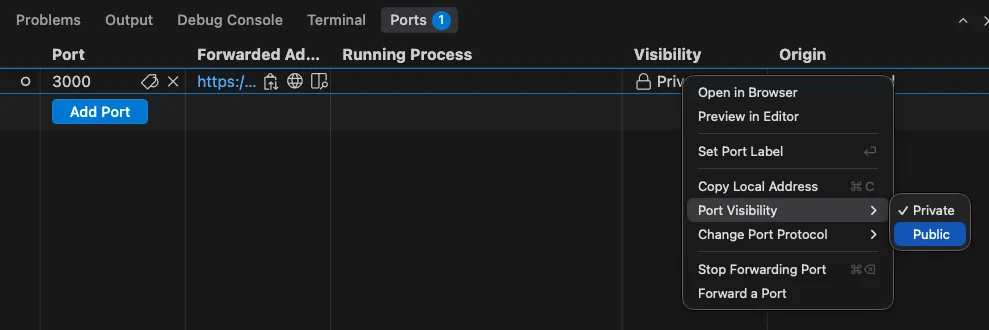
Once you have one of the remote tunnel options running, browse to the remote URL to confirm your app is successfully served. (In VS Code, click the globe icon on the forwarded port.)
If you’re using ngrok, a new URL will be generated every time you restart the tunnel. When the URL changes, make sure to update the value in two places described in the following exercise:
APP_ORIGINin.env.local(restart the dev server)- The callback URLs in the Developer Portal
Make sure to capture the public HTTPS base URL for use in the following steps.
Register the app in the Developer Portal
App registration happens in the Developer Portal. Creating an account there is free and doesn’t require a partnership — a partnership is only needed to publish to the marketplace. See Beginning development for the broader prerequisites and Managing apps in Dev Portal for a tour of the app profile. You’ll also need a store whose control panel you can sign into as a user with permission to install apps.
Make sure the sign into the Developer Portal using the same account that has owner permissions for your sandbox store.
-
Use the “Create New” button in the Developer Portal.
-
Copy the Client ID and Client Secret for use in the next step.
-
On the Technical tab of your new app, set the callback URLs, substituting your tunnel URL for
<APP_ORIGIN>:These map to the four route handlers under
src/app/api/app/. The Auth callback URL must matchAPP_ORIGINexactly — the app sends it back to BigCommerce as the OAuthredirect_uriduring the token exchange, and BigCommerce rejects a mismatch.
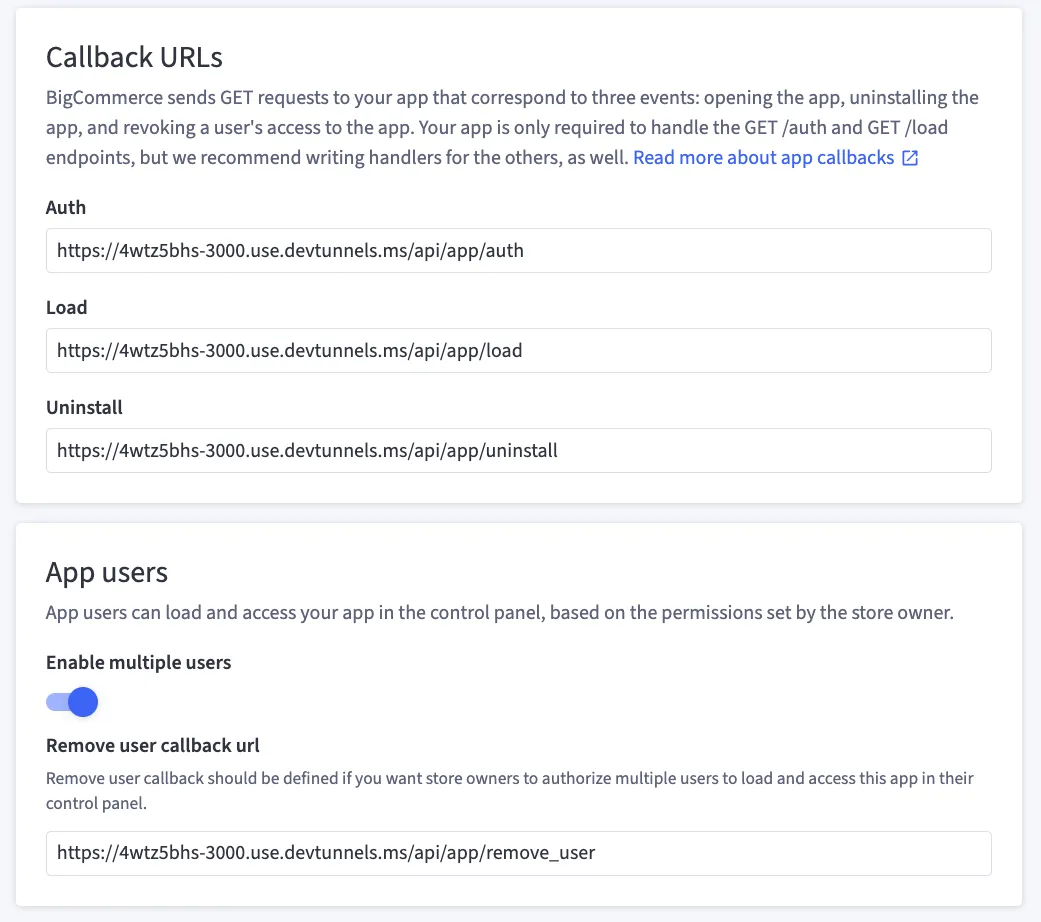
Note that you’ll only be implementing the Auth and Load callbacks in this exercise. The full example app implements all four, and you’ll have a chance to examine the implementations of Uninstall and Remove User at the end of the tutorial.
-
On the Scopes tab, enable:
- Customers: modify
- Marketing: modify
- Channel Settings: read-only
- Channel Listings: read-only
- Information & Settings: read-only
- App Extensions: manage
Keep the app in draft status. A draft app is installable from the control panel of any store your Developer Portal account owns, which is all you need for this tutorial.
Set environment variables
Set the following in .env.local (and .env.example) to prepare for all steps in this exercise, then restart the dev server.
Generate a value for CREDENTIALS_ENCRYPTION_KEY with the following command:
CREDENTIALS_ENCRYPTION_KEY encrypts stored store access tokens at rest.
If you change CREDENTIALS_ENCRYPTION_KEY after storing tokens, previously stored tokens can no longer be decrypted.
After changing DATA_MODE to MULTITENANT, when browsing to the root URL of your app, you’ll now notice an “Unauthorized” error. In this
production mode, only /store/<store-hash>/... URLs are allowed. You’ll no longer be browsing to your app directly.
Now that your app is running through a remote tunnel and you’ve configured your app in the Developer Portal, you’re ready to build the appropriate authentication flow to embed a single-click app in the BigCommerce control panel.
Build the SQLite credentials store driver
The first thing you’ll need is a place to store the API tokens negotiated during the single-click install process. The initial storage implementation in this app will be via SQLite; configuring an external database won’t be required.
Ignore the SQLite file
The file data/credentials.sqlite will be created the first time your app writes to SQLite. These data files shouldn’t be tracked in your project’s version control.
Update .gitignore to exclude *.sqlite files.
Define the credentials store schema
Replace the contents of src/lib/credentials-store/sqlite-driver/schema.ts.
This schema defines tables for information about stores where the app is installed, users that have logged into the app, and the store/user relationship. The schema will be run whenever the app connects to SQLite.
Build the SQLite driver implementation
This is the most verbose step in this exercise, handling the grunt work of the database reads and writes.
Replace the contents of src/lib/credentials-store/sqlite-driver/sqlite-credentials-store.ts.
This driver is a local-development choice only. node:sqlite gives synchronous, in-process access to one file on disk, which can’t be shared across the multiple instances a real deployment runs. Every method still returns a Promise to satisfy the shared CredentialsStore interface, even though the work underneath happens synchronously.
The SqliteCredentialsStore class is instantiated, with the database connection being opened and schema being created in the constructor. Note the class’s support not just for
upserting (ON CONFLICT ... DO UPDATE) into the various tables, but also for fetching a store’s token, checking if a user exists on a store, and deleting all records related to a store.
Create the credentials store accessor
Similar to the controller function that selects the appropriate API client, you’ll now build out a function to select the credentials storage
driver (based on the CREDENTIALS_STORE_DRIVER environment variable).
Replace the contents of src/lib/credentials-store/get-credentials-store.ts.
Look up the store token through the credentials store
Recall the function resolveApiToken, used by the API client controller. Currently, this supports only “MOCK” and “STATIC” modes. Now that you’ve
implemented storage for API tokens, you can update this function to support looking up a token based on the store hash.
Update src/lib/bc-api-client/resolve-store-credentials.ts.
The critical storage requirements are now handled in the application, and you’re ready to implement the single-click authentication flow.
Implement the install callback
When registering your app in the Developer Portal, you set the install callback URL to /api/app/auth. This is the route that BigCommerce will call
when a user initiates a request to install the app. In this step, you’ll implement this endpoint.
Implement the OAuth token exchange
BigCommerce sends a payload including an OAuth code to the install callback URL in your app. The critical function your callback must perform is to make a request to BigCommerce to exchange this code for a permanent, store-scoped API token. Implement a utility function for performing this exchange.
Replace the contents of src/lib/bc-auth/exchange-code-for-token.ts.
Note the use of zod, a popular library that simplifies validation against a schema. This function utilizes it to ensure the token response
from BigCommerce is in the expected format.
Implement the install action with storage
The next utility function will encapsulate the logic for installing the app on a store, including performing the token exchange and persisting store and user records (including the API token) to storage.
Replace the contents of src/lib/bc-auth/install-store.ts.
The data expected in the params (code, context, scope, and redirectUri) aligns with the params BigCommerce includes in the auth payload.
The API token is the key piece of data being stored here, but the app also records information about the specific user. This is the foundation for multi-user support, recommended for all single-click apps. Tracking per-user information serves two important purposes:
- The store/user record will be used for authentication. Removing this record when an admin revokes a user’s access will ensure no stale browser sessions continue to allow access.
- The app may choose to implement granular permissions for specific actions, exposing an interface to manage each user’s individual permissions.
Wire up the install route handler
Now that the key logic is in place, implement the API route handler itself to handle the BigCommerce auth callback.
Replace the contents of src/app/api/app/auth/route.ts.
The API route is letting the previously created function handle the heavy lifting and takes care of redirecting the user to the home page of the app after a successful install.
getAbsoluteAppUrl handles generating a fully qualified URL using the env var APP_ORIGIN. Note the use of the storeHash in the home page
redirect, resulting in a URL path like /store/<store-hash>/. All URLs generated within the app for actions and navigation will use this
URL structure.
With the install callback implemented, you’re ready to try installing the app in your store control panel.
Another reminder: Make sure you have your dev server and remote tunnel running. If using VS Code or Git Codespace forwarding, you also must make sure your forwarded port has been set to “Public” visibility!
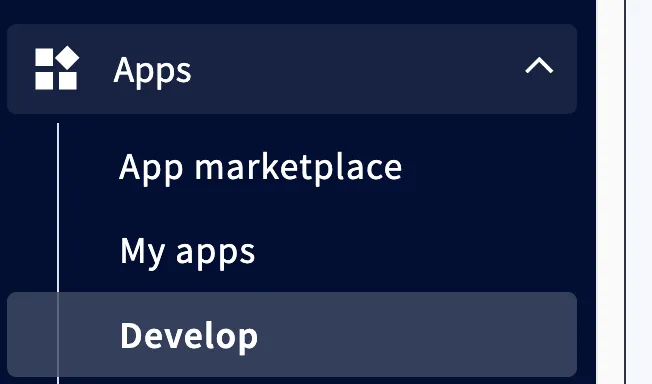
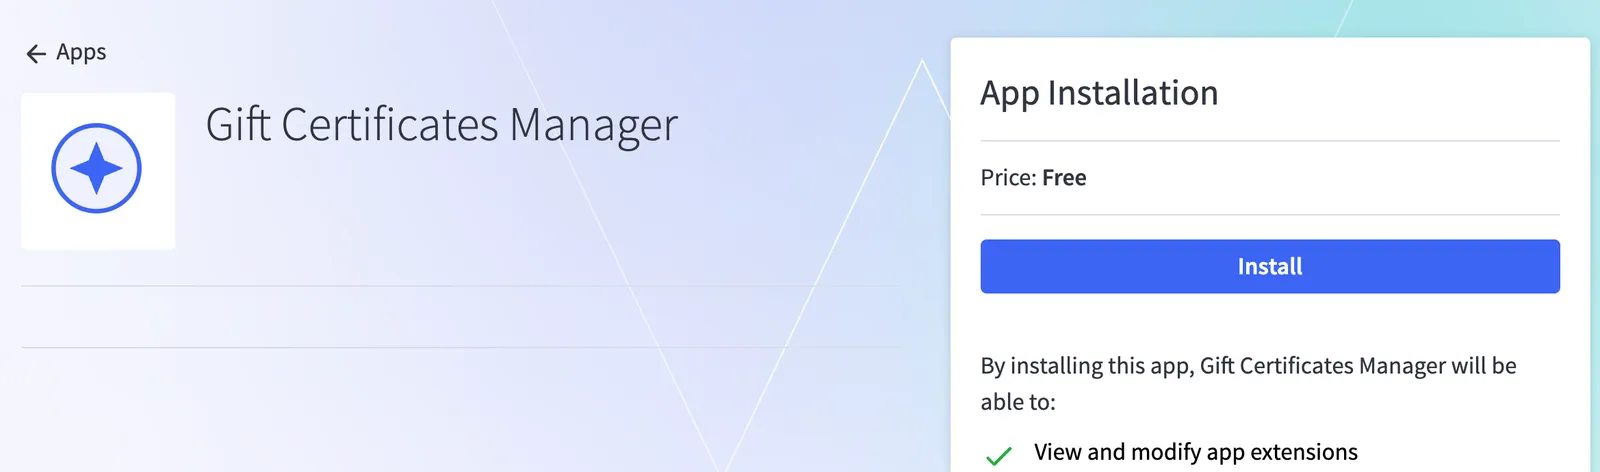
Log into your sandbox store using the same account that owns the app entry in the Developer Portal. Navigate to Apps -> Develop and choose your test app to start the install process.
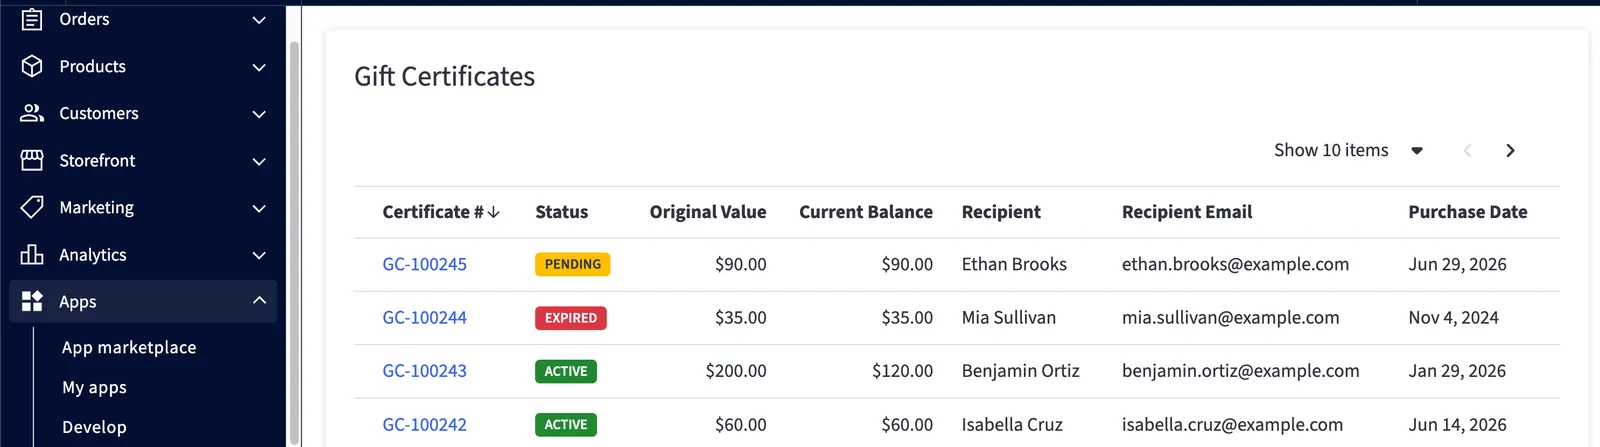
After installing, you should see the same home page with your gift certificates list, now rendered directly in your store control panel.
Implement the load callback
So far, only initial installation is handled by your app. Within the store control panel, if you navigate away from the app and then back (via its entry under “Apps” in the left navbar), the app will fail to load. You must implement the load callback to handle each time a user navigates to the app.
Implement payload verification
BigCommerce includes a signed payload in each load request. First, implement a utility function to verify the payload is valid.
Update the contents of src/lib/bc-auth/verify-signed-payload.ts as shown.
zod is used once again to validate that the payload exhibits the expected shape.
BigCommerce delivers the payload as a Json Web Token (JWT) signed with the registered app’s client secret. The verification logic uses jwtVerify
with the secret to confirm the payload originated from BigCommerce and hasn’t been tampered with.
Note that the library jose is used for JWT handling. This library ensures the widest compatibility with different runtimes.
Implement the load action
The job of the load action is to perform the payload verification and ensure a record exists for the user in credentials storage.
Replace the contents of src/lib/bc-auth/load-store.ts.
A key detail to note about the load action: No store record is written to storage. Each store’s record is written, with its API token, only when the app is first installed on that store. The only potentially new information to record each time the load callback is called is the individual user who is accessing the app in this session.
Return to your store control panel and try re-opening your app from the “Apps” menu.
Troubleshooting
- Nothing reaches your app. The tunnel is down, its URL has changed, or its visibility is private. Load
<APP_ORIGIN>directly in a browser to confirm. - A stale URL somewhere. After any tunnel URL change,
APP_ORIGIN, all four Developer Portal callback URLs, and a dev server restart all have to agree. It’s also worth uninstalling and reinstalling the app, since the stored install is tied to the old origin.
See the full Running Locally as a Single-Click App guide for more failure modes.