

Lab - Edit config.json File
In this lab, you will:
- Edit the config.json file
- Create a variation
Prerequisites:
- BigCommerce Store (sandbox or live)
- Stencil CLI installed
- Cornerstone base theme installed
- Preferred IDE is installed and the Cornerstone theme is open
This course will use VSCode. For more information about VSCode, see the resource at the end of the lesson. You are able to use the development environment of choice.
Introduction
You will be able to configure the /theme‑name/config.json file to properly manage each of your custom theme’s frontend aspects. The config.json file functions:
- Provide global context for Stencil’s CSS and Handlebars resources
- Provide values for the Store Design GUI to manage
- Provide metadata for your theme’s listing in the Theme Marketplace
- Define variations included in your theme
Configure config.json Keys
The first thing you must do when beginning theme developement is configure certain values in the cornerstone/config.json file. For example, here are the first few key/value sets in Cornerstone’s config.json:
The next code block shows how you might change these values to reflect your own theme’s name, version number, price on Theme Marketplace, and documentation URL. These values also appear in a client’s store if the theme is not published in the marketplace. Naming and versioning themes is a good practice even if you have no intent to distribute the theme via the marketplace:
config.json Interactions
To customize your theme’s appearance at a global level, the values that you define in the <theme-name>/config.json file interact with local resources. Your config.json definitions set global defaults for templates, front-matter attributes and Handlebars resources throughout your theme. You can also define custom variables in config.json, named according to your needs.
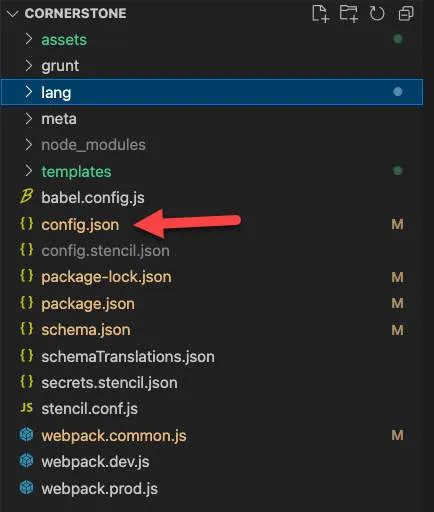
Open config.json From the locally installed Stencil Theme, open config.json file.
Step 1: Change Settings in config.json
- Open the locally installed Cornerstone theme in your IDE
- Ensure the CLI is initialized an the theme is launched on local host 3000
Please see Stencil Docs for reference files.
- Open config.json in your IDE
- Locate “footer-backgroundColor”
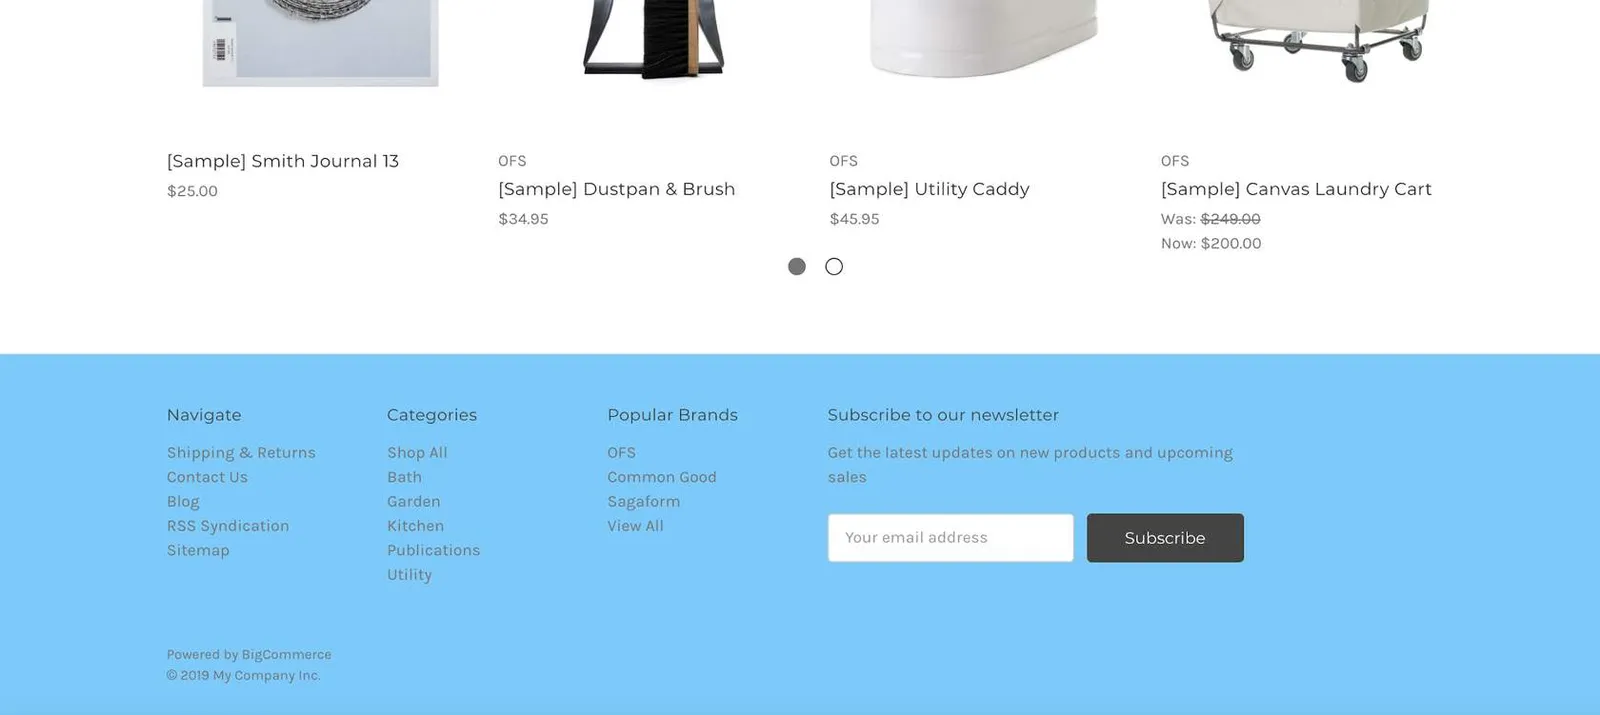
- Replace the hex color value with #66ccff
- Observe change on local host 3000
Before
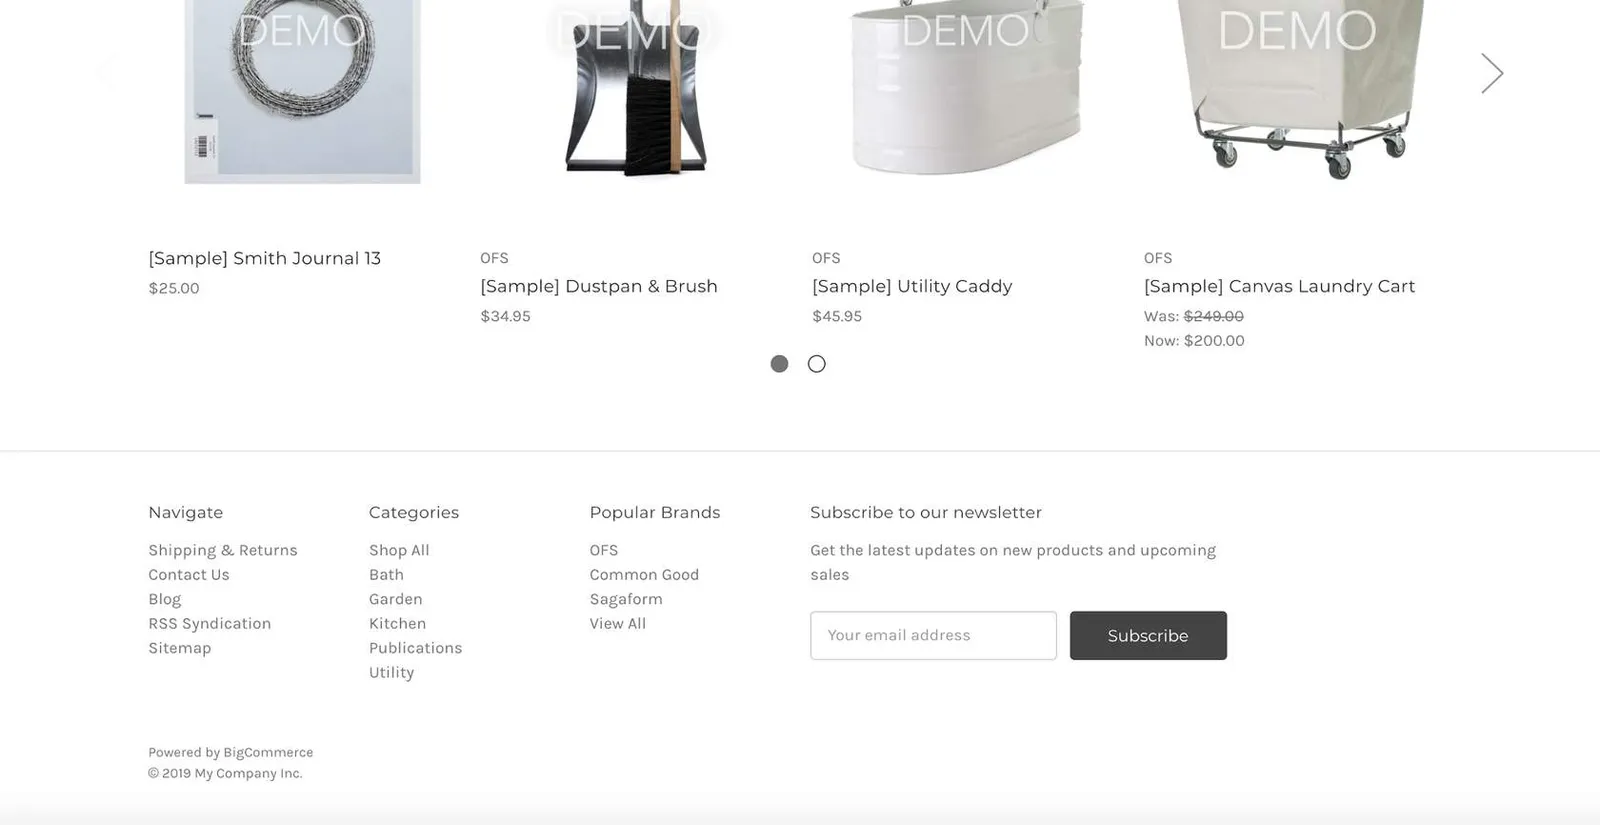
After
Step 2: Create a Variation
- Locate the Variations section in config.json
- Copy the entire section for the “Bold” variation, from the opening bracket by the variation name down to just before the opening bracket for the next variation.
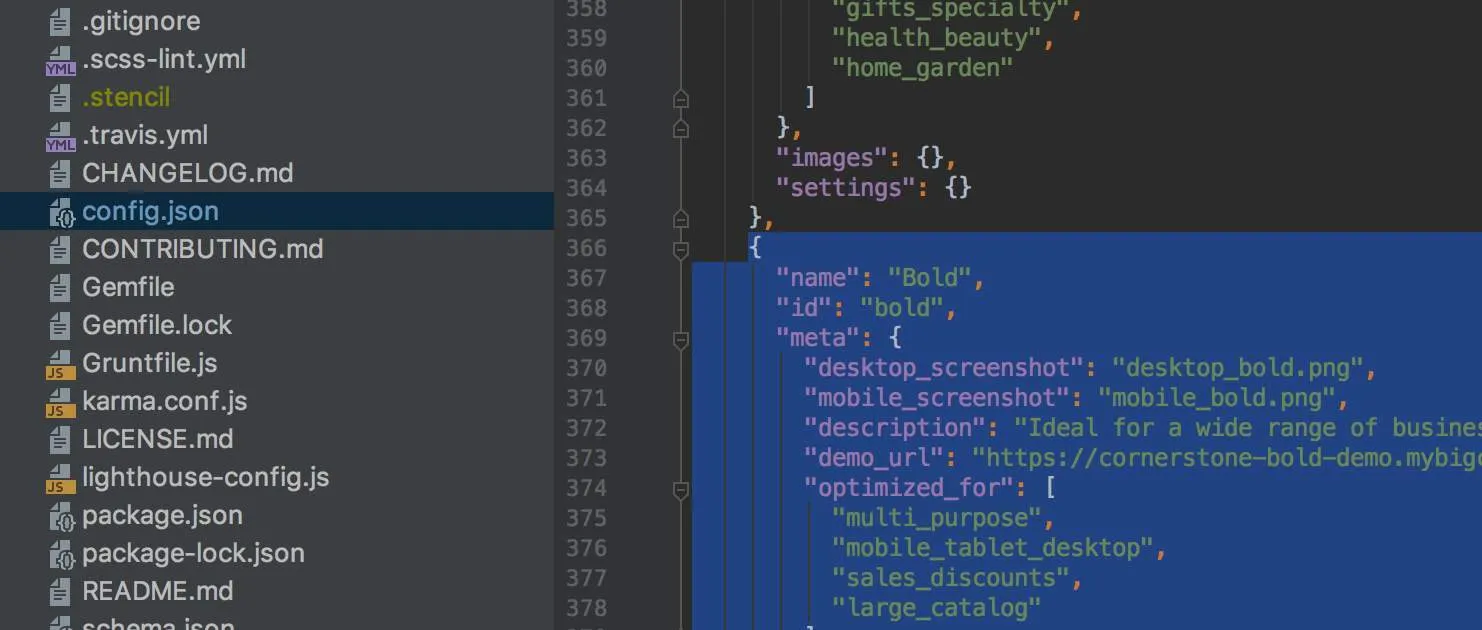
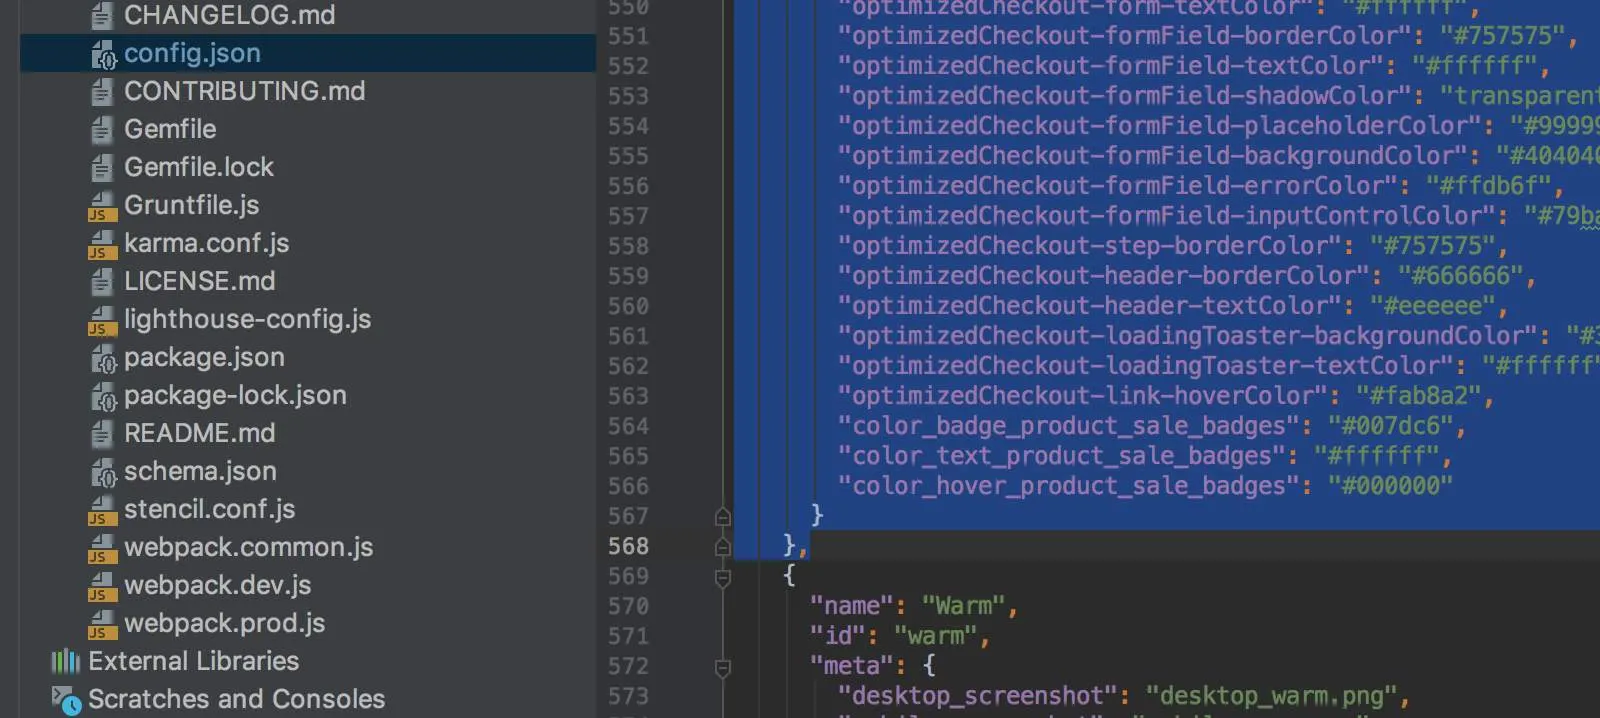
- Paste the variation contents below the existing “Bold” variation.
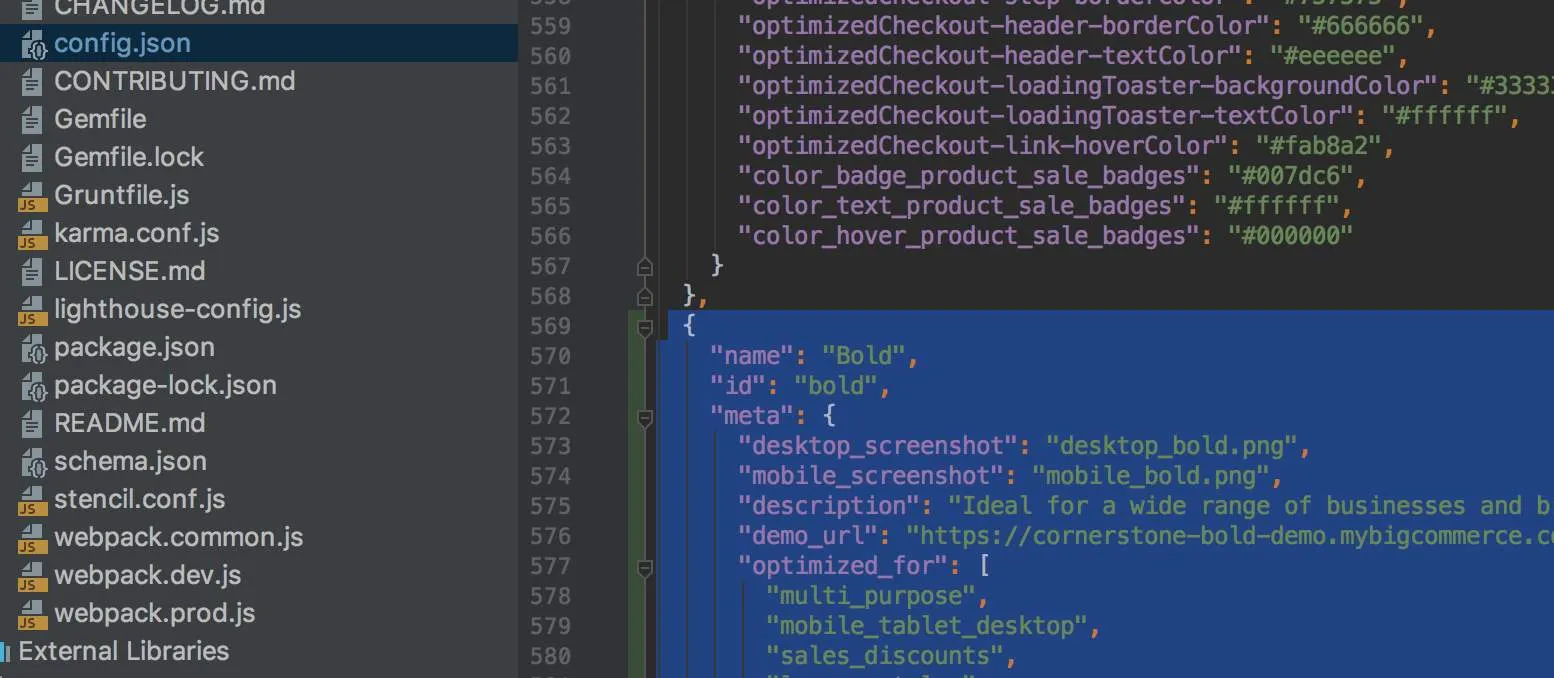
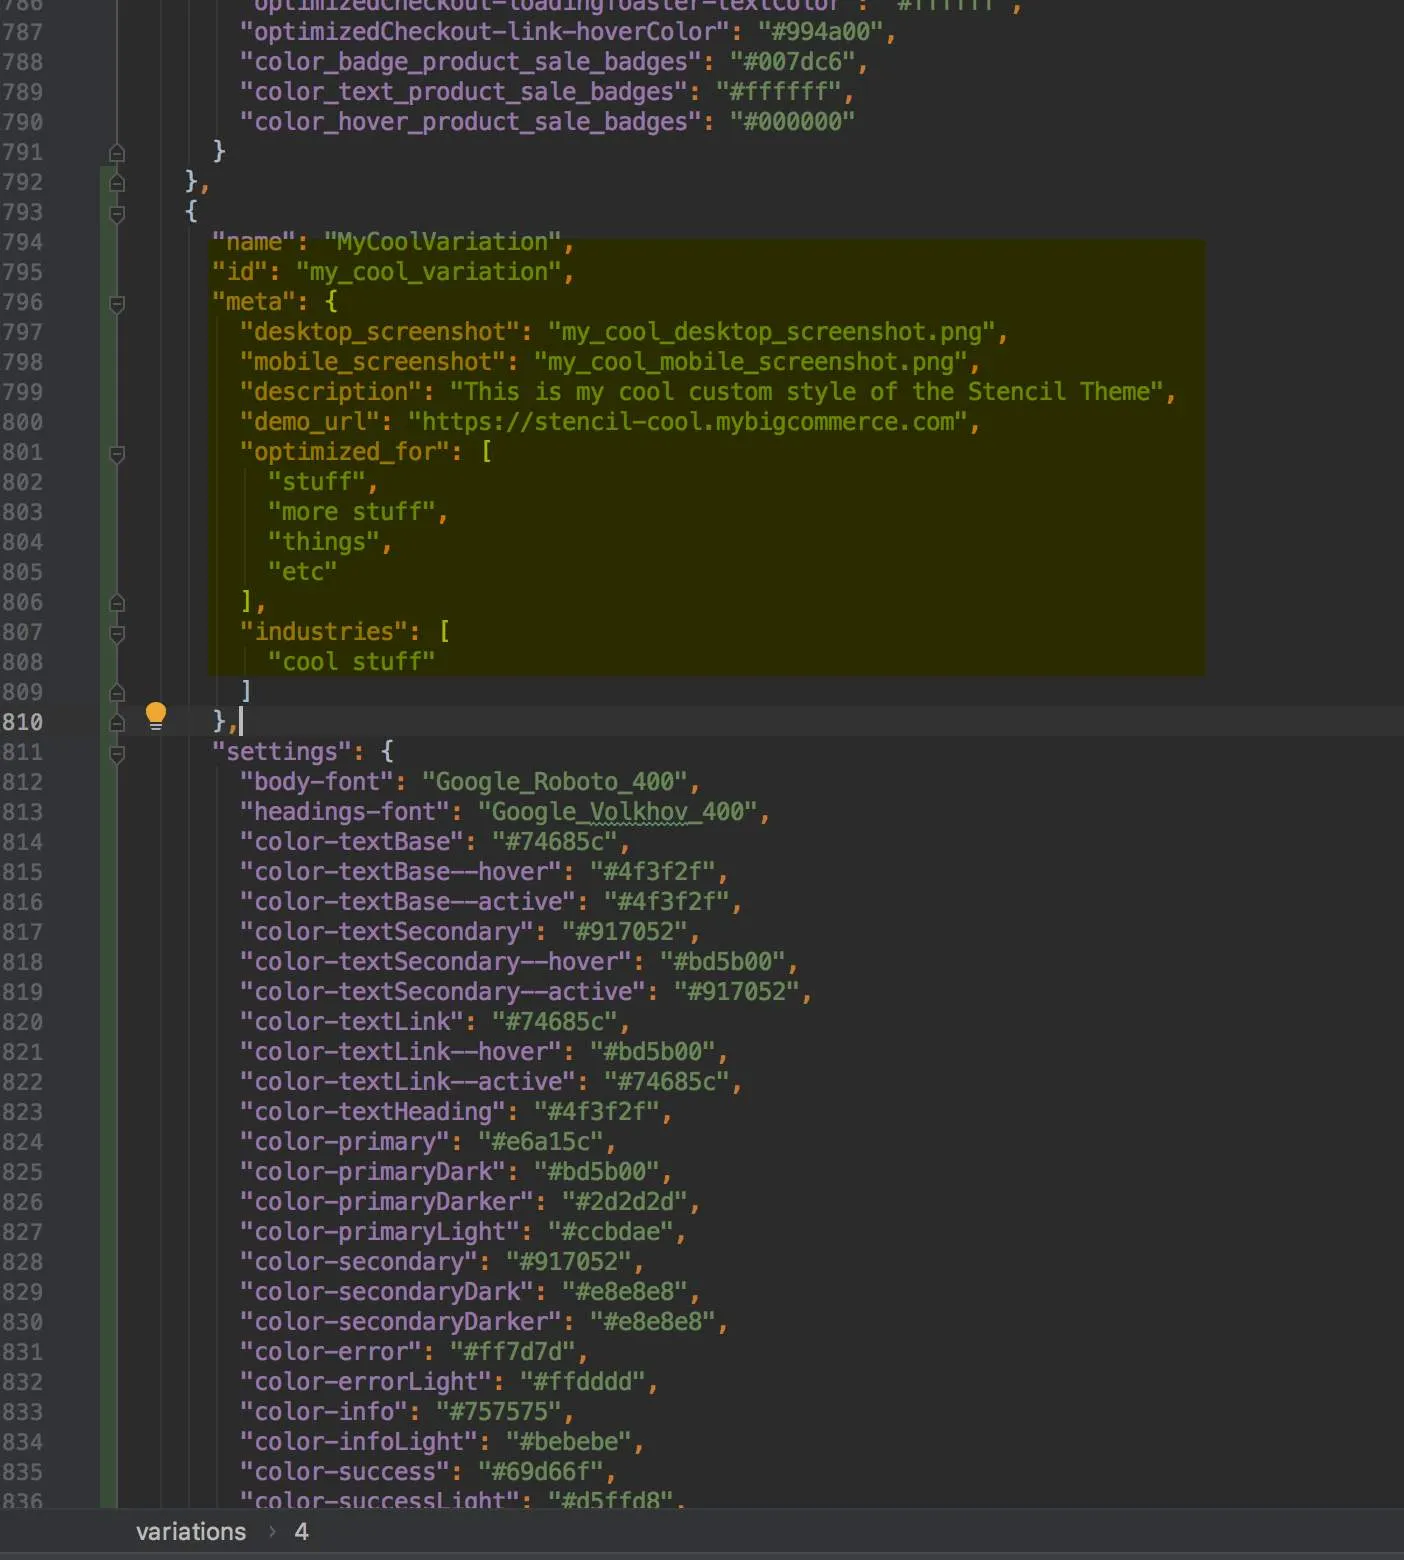
- Edit the pasted variation head to designate a new variation for the theme.
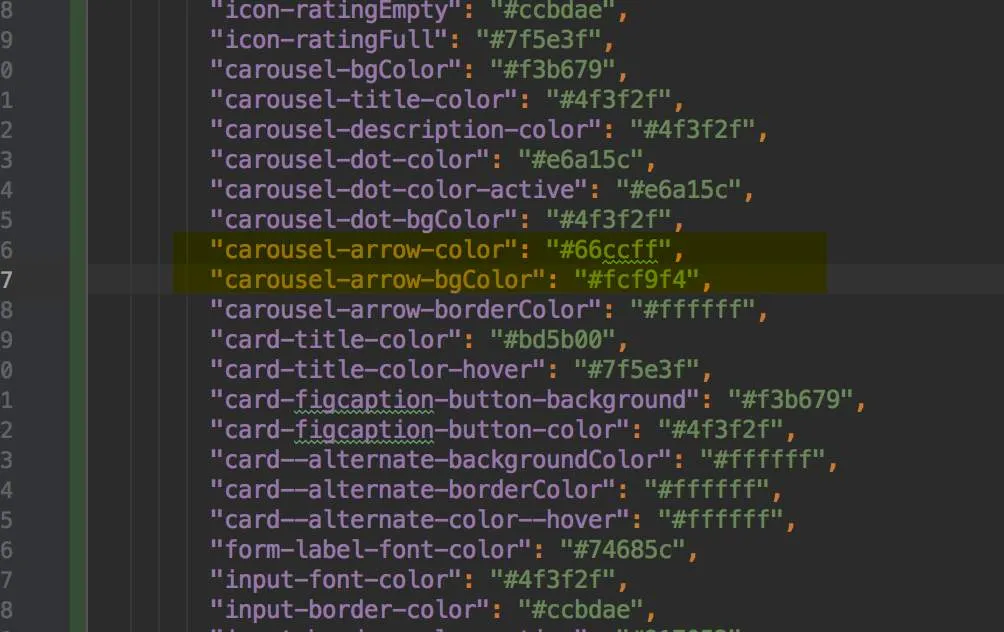
- Change the “carousel arrow color” to “#66ccff”
- Change the “carousel arrow bgColor” to “#fcf9f4”
- Launch Stencil with the stencil start -v option. You’ll want to include your variant name in the command prompt, like below:
If Stencil is already running, you will need to end the process and start again with the -v. Use the following command to stop Stencil:
CTRL+C
- Observe carousel arrows changed to blue.

Before proceeding to the next lab, either switch back to the original variation (stencil start), or ensure you are making changes in the Settings of the variation created above.