

Lab - Add an Overview Page
Introduction
In this exercise, you’ll add a brand new “Overview” page to the Buyer Portal, and in the process you’ll practice routing setup, permissions configuration, and navigation between pages.
In this lab, you will:
- Add simple route permissions configuration
- Configure a new page route
- Make content conditional on permissions
- Navigate in response to user interaction
Setup
This exercise continues where you left off previously. Make sure the dev server is started in your Buyer Portal project:
Remember!
These exercises will proceed from a project you previously set up from the lab repository, which contains necessary boilerplate code.
Script Manager in your store control panel must contain appropriate header/footer scripts to load the Buyer Portal from your local environment on the appropriate port.
Revisit the initial setup lab if necessary to review the details.
Exercise Reference Copy
If it’s helpful to compare your own code as you go, you can clone or download the completed version of this labs as a reference.
Step 1: Configure the Route
Remember, all file paths referenced in these exercises are relative to apps/storefront/src in your Buyer Portal project.
The project you’ve copied already has a very basic component for the page you’ll be setting up, at pages/Overview/index.tsx. Before the Overview page will show up in the frontend, you must map this component to a route and provide several other pieces of configuration for that route.
The route configuration in question will make reference to permissions, so we’ll need to set those up first.
- Open
shared/routes/config.ts. This file contains route-related permissions configuration. - Modify
legacyPermissionsto add a new item for Overview.
The order of the items in this config object does not strictly matter. Notice that the array’s values are supplied by a CustomerRole enumeration. Our intention is that the Overview page is accessible by all users, so we’ve mimicked ordersPermissions, which lists all possible roles.
- Modify
newPermissionsto similarly add a line for Overview.
Again, we are mimicking the loosest restrictions with these permissions, so in this case we have duplicated getShoppingListPermission.
On Permissions
config.ts contains two different types of permissions:
- Role-based permissions are based on a user’s role, such as Senior Buyer, Junior Buyer, or custom roles.
legacyPermissionsmaps various roles to a route key. - Permission “codes” are more granular, based on the specific permissions that are granted to roles in the B2B Edition backend.
newPermissionsmaps a permission code to a route key.
You may notice that the values in newPermissions reference values from a b2bPermissionsMap containing the various permission strings (such as “get_shopping_lists”, “create_quote”, “get_invoice_detail”, etc). The built-in values here correspond with the permissions that exist in B2B Edition by default and are assigned to the various built-in roles.
We might consider defining our own custom permission with the B2B Edition API and incorporating that permission’s code into the map. To keep things simple, we’ve instead re-used an existing permission (getShoppingListPermission or “get_shopping_lists”). Users in our store who have the “get shopping lists” permission will also be able to access the Overview page.
Routing Config
Now that we have permissions, we can wire up the new route by modifying a couple of key files.
- Open
shared/routeList.ts, which defines all routes with their basic config. - Update
routeListwith a new Overview item.
This config includes the following:
pathdefines the hash portion of the URL path that will correspond with the page.isMenuItemdeclares that this page should appear in the nav menu.permissionsandpermissionCodesapply the permissions config we prepared.isTokenLogindeclares that a user must be logged in to access this page.idLangidentifies the locale string key used to look up the locale-specific page title. (The “Overview” page title has already been included in the locale strings inlib/lang/locales/en.json.)
The only thing we haven’t taken care of with this config is actually mapping the “/overview” route to the page component. This is handled in a separate file.
- Open
shared/routes/index.tsxand add a “lazy” import of the correct component, as well as the required config inroutesMap.
We’ve actually completed all the config required for our page to be displayed. One last change we’ll make is to add a new constant to provide a clean and consistent way to reference this route (such as with window.b2b.utils.openPage).
- Open
constants/index.tsand add anOVERVIEWconstant toHeadlessRoutes.
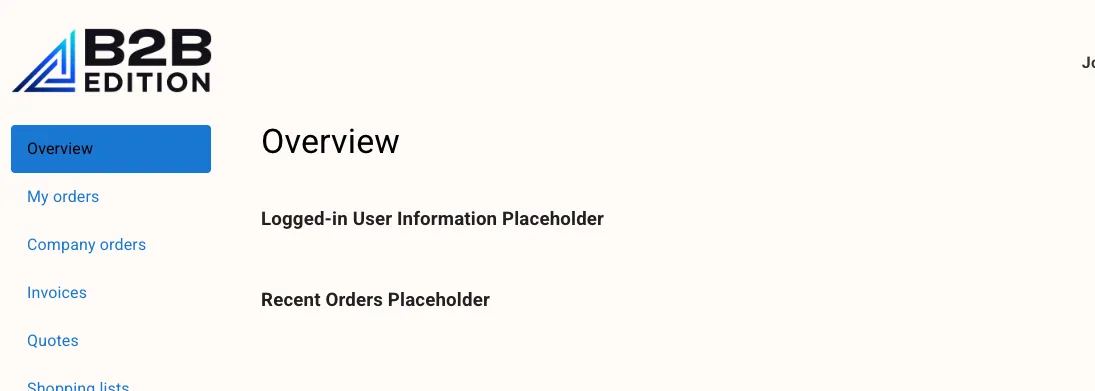
Any company user should now see the “Overview” item in the Buyer Portal nav menu. The page is currently very bare, containing only placeholders for the sections we’ll be building.
What About React Router?
You might have noticed that the code we’ve added didn’t directly deal with React Router. The Buyer Portal manages information about the various routes via the configuration we’ve seen, and we don’t need to worry about updating the code that iterates over this config to create the routes themselves.
Here’s a brief overview of the wiring involved:
App.tsxwraps the entire layout inHashRouterfrom thereact-router-dompackage.components/layout/B3RenderRouter.tsxhandles the heavy lifting:- The
RoutesandRoutecomponents fromreact-router-domare used to declare the routes. getAllowedRoutesis used to fetch the config of all routes the user has permissions for.- The list of routes is looped, with a
Routecomponent rendered for each.
- The
Step 2: Change the Default Page
Our remaining steps for this exercise won’t be as involved as the router config. First, an “Overview” page probably makes the most sense as the default page when a user first opens the Buyer Portal.
The logic for determining this landing page is contained in a utility function.
- Open
utils/b3CheckPermissions/b2bPermissionPath.tsand add a conditional to the top ofb2bJumpPath.
The very first condition in the utility function will now return the “Overview” route as the default route for any user with the shopping list permission (the same permission we tied our route config to).
Realistically, this condition should apply to any of the built-in roles, but we’ll leave most of the function’s remaining logic in place, since we’ve tied our own condition explicitly to a permission code. The only clean-up we need to do is to get rid of the existing condition relying on the shopping list permission; this conditional is redundant now and will never be reached.
- Remove the
hasPermission('getShoppingListPermission')conditional block later in the function.
Try closing the Buyer Portal and then re-opening it with the “Account” nav link. You should find that Overview is presented immediately.
Step 3: Restrict Content by Permissions
Remember that we’ve configured our route permissions such that anyone allowed to view shopping lists can access the Overview page itself.
As indicated by the page’s current placeholders, however, part of the page’s content will include information about recent orders. Our shopping list permission does not guarantee that a given user is allowed to view orders! What we need in this case is to check the user’s permissions within our component logic to make this content conditional.
- Open
pages/Overview/index.tsx, which contains the main page component. - Add the following immediately before the returned JSX.
The Buyer Portal resolves the current user’s permissions into global state, and rolePermissionSelector reads them back out. The selector returns an object with a boolean for every permission in b2bPermissionsMap, so destructuring getOrderPermission gives us a simple flag for “may this user view company orders?”
useAppSelector is the Buyer Portal’s hook for reading global state managed by Redux. We’re using it here because it’s the pattern the portal itself uses for permission checks, but don’t worry about the details yet — we’ll cover Redux, selectors, and global state in depth in a later module.
Because the value comes from global state, this check is also reactive: if the user’s permissions change, the page re-renders automatically.
- In the component’s JSX, wrap the “Recent Orders” placeholder in a conditional.
Try logging into your storefront as a user with the “Junior Buyer” role. With the new permission check in place, the “Recent Orders” placeholder should no longer appear.
Don’t forget to log in again as a user with full admin permissions before subsequent labs!
Step 4: Navigate Between Pages
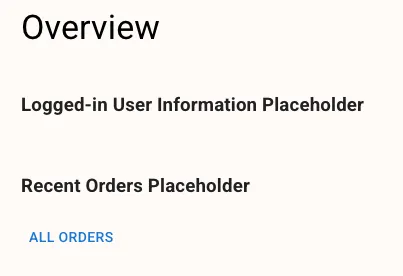
In our last step for this exercise, we’ll add a link to another Buyer Portal page. Our Overview page will show only limited information about recent orders (and later other data). We’ll provide a link taking users straight to the main orders page.
Because the Buyer Portal is a React Router application, in-app navigation is handled with React Router’s useNavigate hook. The hook returns a navigate function that accepts the Buyer Portal path to move to.
- Open
pages/Overview/index.tsxand call theuseNavigatehook.
- Add a
Buttoncomponent that callsnavigate.
Note the argument passed to navigate:
- We’re making use of a
HeadlessRoutesconstant for the target page. We can also manually pass relative paths (such as if the path contains a dynamic slug), but relying on these constants when possible is the safest method. - Because this is client-side routing, only the affected page components re-render. No request is made to the server.
Visit the Overview page again and verify that your “All Orders” link functions.
While not the focus of this exercise, the following are notable about our code:
- The
Buttoncomponent, and theGridcomponent already present in the page, are part of the Material UI library, which we’ll explore next. - The
b3Langfunction renders a localized string based on the JSON files inlib/lang/locales.
Full Exercise Code
Taking It Further
- Utilize the B2B REST Management API to create a new permission called “overview”. Then add this permission code to the master list and make the appropriate changes to incorporate this custom permission. Create a custom role with this permission in the control panel to test out your logic.
- Imagine a piece of React state that might be useful for all pages to access. Identify the appropriate place to initialize that state value and pass it as a prop to all route components.